Android Tabs with interacting map and list views
 Last tutorial, we wrote a simple app that displays two interacting list views in a
 TabActivity. In this tutorial, we will up the ante and add a MapView as the content of one of the tabs. Why again are we using multiple views in an activity instead of using a separate activity for each tab content? Remember, we want our tabs to be able to easily interact with one another, and keeping them as views allows us to handle the logic and interaction within one activity.
So, our goal in this tutorial is to have a list of geo coordinates and when we click on an item in the list, our map view goes to that location.
Step 1: Create a layout
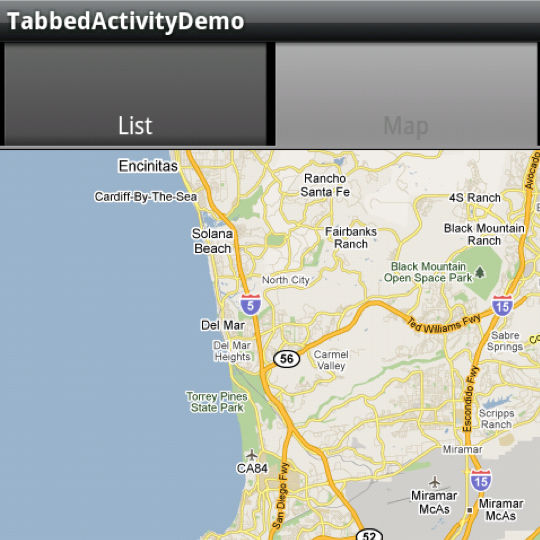
First off, let’s create an XML layout that contains a TabHost, TabWidget, a ListView, and a MapView.
<?xml version="1.0" encoding="utf-8"?>
<TabHost xmlns:android="http://schemas.android.com/apk/res/android"
	android:id="@android:id/tabhost" android:layout_width="fill_parent"
	android:layout_height="fill_parent">
	<LinearLayout android:orientation="vertical"
		android:layout_width="fill_parent" android:layout_height="fill_parent">
		<TabWidget android:id="@android:id/tabs"
			android:layout_width="fill_parent" android:layout_height="wrap_content" />
		<FrameLayout android:id="@android:id/tabcontent"
			android:layout_width="fill_parent" android:layout_height="fill_parent">
			<LinearLayout android:orientation="vertical"
				android:layout_width="fill_parent" android:layout_height="fill_parent"
				android:id="@+id/main">
				<ListView android:id="@+id/list" android:layout_width="fill_parent"
					android:layout_height="0dip" android:layout_weight="1" />
				<TextView android:id="@+id/empty" android:layout_width="wrap_content"
					android:layout_height="wrap_content" android:gravity="center"
					android:text="Loading" />
			</LinearLayout>
			<RelativeLayout xmlns:android="http://schemas.android.com/apk/res/android"
				android:id="@+id/mainlayout" android:orientation="vertical"
				android:layout_width="fill_parent" android:layout_height="fill_parent">
				<com.google.android.maps.MapView
					android:id="@+id/mapview" android:layout_width="fill_parent"
					android:layout_height="fill_parent" android:clickable="true"
					android:apiKey="[your MAPS API KEY here]" />
			</RelativeLayout>
		</FrameLayout>
	</LinearLayout>
</TabHost>
Step 2: Write the Activity Code
Once we have a layout, we need to create our main Activity. While last tutorial our Activity was of type TabActivity, in this tutorial our Activity has to be of type MapActivity.
Why is this? Using a MapView in Android must be in a MapActivity class, otherwise your app with throw an Exception (take a look at the activities source code if you’re interested in more details). As a result of this, we will have to perform the functions of TabActivity ourselves in the MapActivity class (you’ll see that below).
Let’s create a class called TabbedListMapActivity and have it extend MapActivity.
In the onCreate() method, we need to set the content to our XML layout, extract the TabHost object, and call setup() on the TabHost (we need to do this because our Activity is not a TabActivity).
setContentView(R.layout.main);

tabHost = (TabHost) findViewById(android.R.id.tabhost);

// setup must be called if you are not inflating the tabhost from XML

tabHost.setup();
Next, we want to extract our ListView from the XML, set it to a member variable, and add some initial coordinates to its list adapter.
// setup list view

listView = (ListView) findViewById(R.id.list);
listView.setEmptyView((TextView) findViewById(R.id.empty));

// create some dummy coordinates to add to the list

List<GeoPoint> pointsList = new ArrayList<GeoPoint>();
pointsList.add(new GeoPoint((int)(32.864*1E6), (int)(-117.2353*1E6)));
pointsList.add(new GeoPoint((int)(37.441*1E6), (int)(-122.1419*1E6)));
listView.setAdapter(new ArrayAdapter(this, android.R.layout.simple_list_item_1, pointsList));
Then, we want to extract our MapView from the XML and set it to a member variable.
// setup map view

mapView = (MapView) findViewById(R.id.mapview);
mapView.setBuiltInZoomControls(true);
mapView.postInvalidate();
Once we have our MapView, we can add a listener to the ListView for selection events. Let’s add a listener that when an item is clicked, we set the map to the coordinates of the selected item.
// add an onclicklistener to see point on the map

listView.setOnItemClickListener(new OnItemClickListener() {
	public void onItemClick(AdapterView parent, View view, int position, long id) {
		GeoPoint geoPoint = (GeoPoint) listView.getAdapter().getItem(position);
		if(geoPoint != null) {
			// have map view moved to this point

			setMapZoomPoint(geoPoint, 12);
			// programmatically switch tabs to the map view

			tabHost.setCurrentTab(1);
		}
	}
});
The setMapZoomPoint method is implemented like this:
private void setMapZoomPoint(GeoPoint geoPoint, int zoomLevel) {
	mapView.getController().setCenter(geoPoint);
	mapView.getController().setZoom(zoomLevel);
	mapView.postInvalidate();
}
The final step is to add our two views (MapView and ListView) as content to our tab host.
// add views to tab host

tabHost.addTab(tabHost.newTabSpec("List").setIndicator("List").setContent(new TabContentFactory() {
	public View createTabContent(String arg0) {
		return listView;
	}
}));
tabHost.addTab(tabHost.newTabSpec("Map").setIndicator("Map").setContent(new TabContentFactory() {
	public View createTabContent(String arg0) {
		return mapView;
	}
}));
Step 3: Fix Common Issues
Now if you were to run this app now, you may notice strange behavior (might just be on my phone). You should see our two tabs starting with the list view tab. Instead you may see the MapView “bleeding” through the ListView. I’m not exactly sure what causes this, but a workaround is to manually set the tab view to the map, then manually set the tab view back to the list. This causes the activity to redraw the tabs correctly. Here’s my workaround in code:
//HACK to get the list view to show up first,

// otherwise the mapview would be bleeding through and visible

tabHost.setCurrentTab(1); //the mapview

tabHost.setCurrentTab(0); //the listview
Now everything should look right and you should be able to click a coordinate on the list view, and the map view tab goes to that spot on the earth.
If you are having issues with seeing the Map, remember you need to use the Google-Apis instead of the standard Android apis, you need to generate a Maps API key, you need to add interest permissions to the manifest, and you need to make sure the uses-library line is inside your application tag in the manifest.
Here’s my manifest for reference:
<?xml version="1.0" encoding="utf-8"?>
<manifest xmlns:android="http://schemas.android.com/apk/res/android"
	package="com.joshclemm.android.tutorial" android:versionCode="1"
	android:versionName="1.0">
	<application android:icon="@drawable/icon" android:label="@string/app_name">
		<activity android:name=".TabbedListMapActivity" android:label="@string/app_name">
			<intent-filter>
				<action android:name="android.intent.action.MAIN" />
				<category android:name="android.intent.category.LAUNCHER" />
			</intent-filter>
		</activity>
		<uses-library android:name="com.google.android.maps" />
	</application>
	<uses-sdk android:minSdkVersion="4"></uses-sdk>
	<uses-permission android:name="android.permission.INTERNET" />
</manifest>
To see an activity with a map and list view in action, check out my Earthquake Alert! Android App
Full Source
Here’s the full Java source code:
package com.joshclemm.android.tutorial;

import java.util.ArrayList;
import java.util.List;

import android.os.Bundle;
import android.view.View;
import android.widget.AdapterView;
import android.widget.ArrayAdapter;
import android.widget.ListView;
import android.widget.TabHost;
import android.widget.TextView;
import android.widget.AdapterView.OnItemClickListener;
import android.widget.TabHost.OnTabChangeListener;
import android.widget.TabHost.TabContentFactory;

import com.google.android.maps.GeoPoint;
import com.google.android.maps.MapActivity;
import com.google.android.maps.MapView;

public class TabbedListMapActivity extends MapActivity implements OnTabChangeListener {

	private static final String LIST_TAB_TAG = "List";
	private static final String MAP_TAB_TAG = "Map";

	private TabHost tabHost;

	private ListView listView;
	private MapView mapView;

    @Override
    public void onCreate(Bundle savedInstanceState) {
        super.onCreate(savedInstanceState);
        setContentView(R.layout.main);

		tabHost = (TabHost) findViewById(android.R.id.tabhost);

		// setup must be called if you are not inflating the tabhost from XML

		tabHost.setup();
		tabHost.setOnTabChangedListener(this);

		// setup list view

		listView = (ListView) findViewById(R.id.list);
		listView.setEmptyView((TextView) findViewById(R.id.empty));

		// create some dummy coordinates to add to the list

		List<GeoPoint> pointsList = new ArrayList<GeoPoint>();
		pointsList.add(new GeoPoint((int)(32.864*1E6), (int)(-117.2353*1E6)));
		pointsList.add(new GeoPoint((int)(37.441*1E6), (int)(-122.1419*1E6)));
		listView.setAdapter(new ArrayAdapter(this, android.R.layout.simple_list_item_1, pointsList));

		// add an onclicklistener to see point on the map

		listView.setOnItemClickListener(new OnItemClickListener() {
			public void onItemClick(AdapterView parent, View view, int position, long id) {
				GeoPoint geoPoint = (GeoPoint) listView.getAdapter().getItem(position);
				if(geoPoint != null) {
					// have map view moved to this point

					setMapZoomPoint(geoPoint, 12);
					// programmatically switch tabs to the map view

					tabHost.setCurrentTab(1);
				}
			}
		});

		// setup map view

		mapView = (MapView) findViewById(R.id.mapview);
		mapView.setBuiltInZoomControls(true);
		mapView.postInvalidate();

		// add views to tab host

		tabHost.addTab(tabHost.newTabSpec(LIST_TAB_TAG).setIndicator("List").setContent(new TabContentFactory() {
			public View createTabContent(String arg0) {
				return listView;
			}
		}));
		tabHost.addTab(tabHost.newTabSpec(MAP_TAB_TAG).setIndicator("Map").setContent(new TabContentFactory() {
			public View createTabContent(String arg0) {
				return mapView;
			}
		}));

		//HACK to get the list view to show up first,

		// otherwise the mapview would be bleeding through and visible

		tabHost.setCurrentTab(1);
		tabHost.setCurrentTab(0);
    }

    /**
     * Instructs the map view to navigate to the point and zoom level specified.
     * @param geoPoint
     * @param zoomLevel
     */
    private void setMapZoomPoint(GeoPoint geoPoint, int zoomLevel) {
		mapView.getController().setCenter(geoPoint);
		mapView.getController().setZoom(zoomLevel);
		mapView.postInvalidate();
	}

    /**
     * From MapActivity, we ignore it for this demo
     */
	@Override
	protected boolean isRouteDisplayed() {
		return false;
	}

	/**
	 * Implement logic here when a tab is selected
	 */
	public void onTabChanged(String tabName) {
		if(tabName.equals(MAP_TAB_TAG)) {
			//do something on the map

		}
		else if(tabName.equals(LIST_TAB_TAG)) {
			//do something on the list

		}
	}
}
Screenshots


You May Also Enjoy
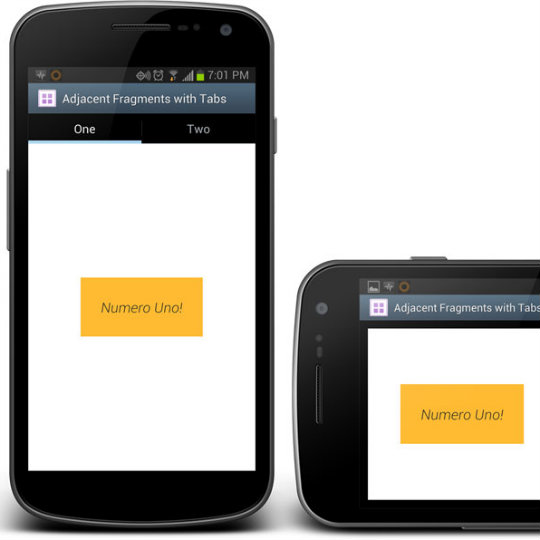
Fragments, Tab Adapter, and Different LayoutsWhen using Fragments in tabs, the FragmentManager takes care of instantiating, retaining, and reusing Fragments. The problem ... |
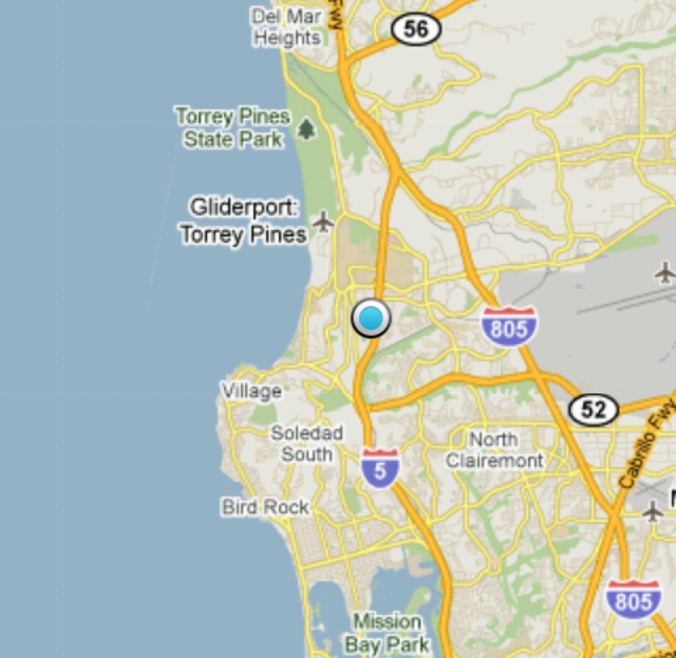
My Map Location Tutorial - Where am I?If you’re writing an Android App using a MapView, then you will most likely want to view the user’s location. This tutorial w... |